Optex InSight INS-QXI-ST Bruksanvisning
Optex rörelse detektor InSight INS-QXI-ST
Läs gratis den bruksanvisning för Optex InSight INS-QXI-ST (4 sidor) i kategorin rörelse detektor. Guiden har ansetts hjälpsam av 17 personer och har ett genomsnittsbetyg på 4.4 stjärnor baserat på 7 recensioner. Har du en fråga om Optex InSight INS-QXI-ST eller vill du ställa frågor till andra användare av produkten? Ställ en fråga
Sida 1/4
INS-QXI-ST
INS-QXI-ST
INSTALLATION INSTRUCTIONS
59-3061-1 2212-27
Quick Guide
1
2
3
4
5
- Specifications
- Dimensions
- Detection area
- Compliance
- How to reset to the factory default
Before installation
Others
<< Contents >>
Page
1
2
3
4
Step
Enable
Disable
Camera angle and PIR area settings
Installation
Device registration to CHeKT portal
DHCP
IP address settings
Checking
VISUAL VERIFICATION PIR CAMERA
Warning
Caution
Prohibition
Recommendation
Failure to follow the instructions provided with this indication and
improper handling may cause death or serious injury.
Failure to follow the instructions provided with this indication and
improper handling may cause injury and/or property damage.
NOTE
Special attention is required to the
section of this symbol.
- Accessories
- Manufacturer's statement
Before installation
Destroy
Disassemble
modify
Intentional watering
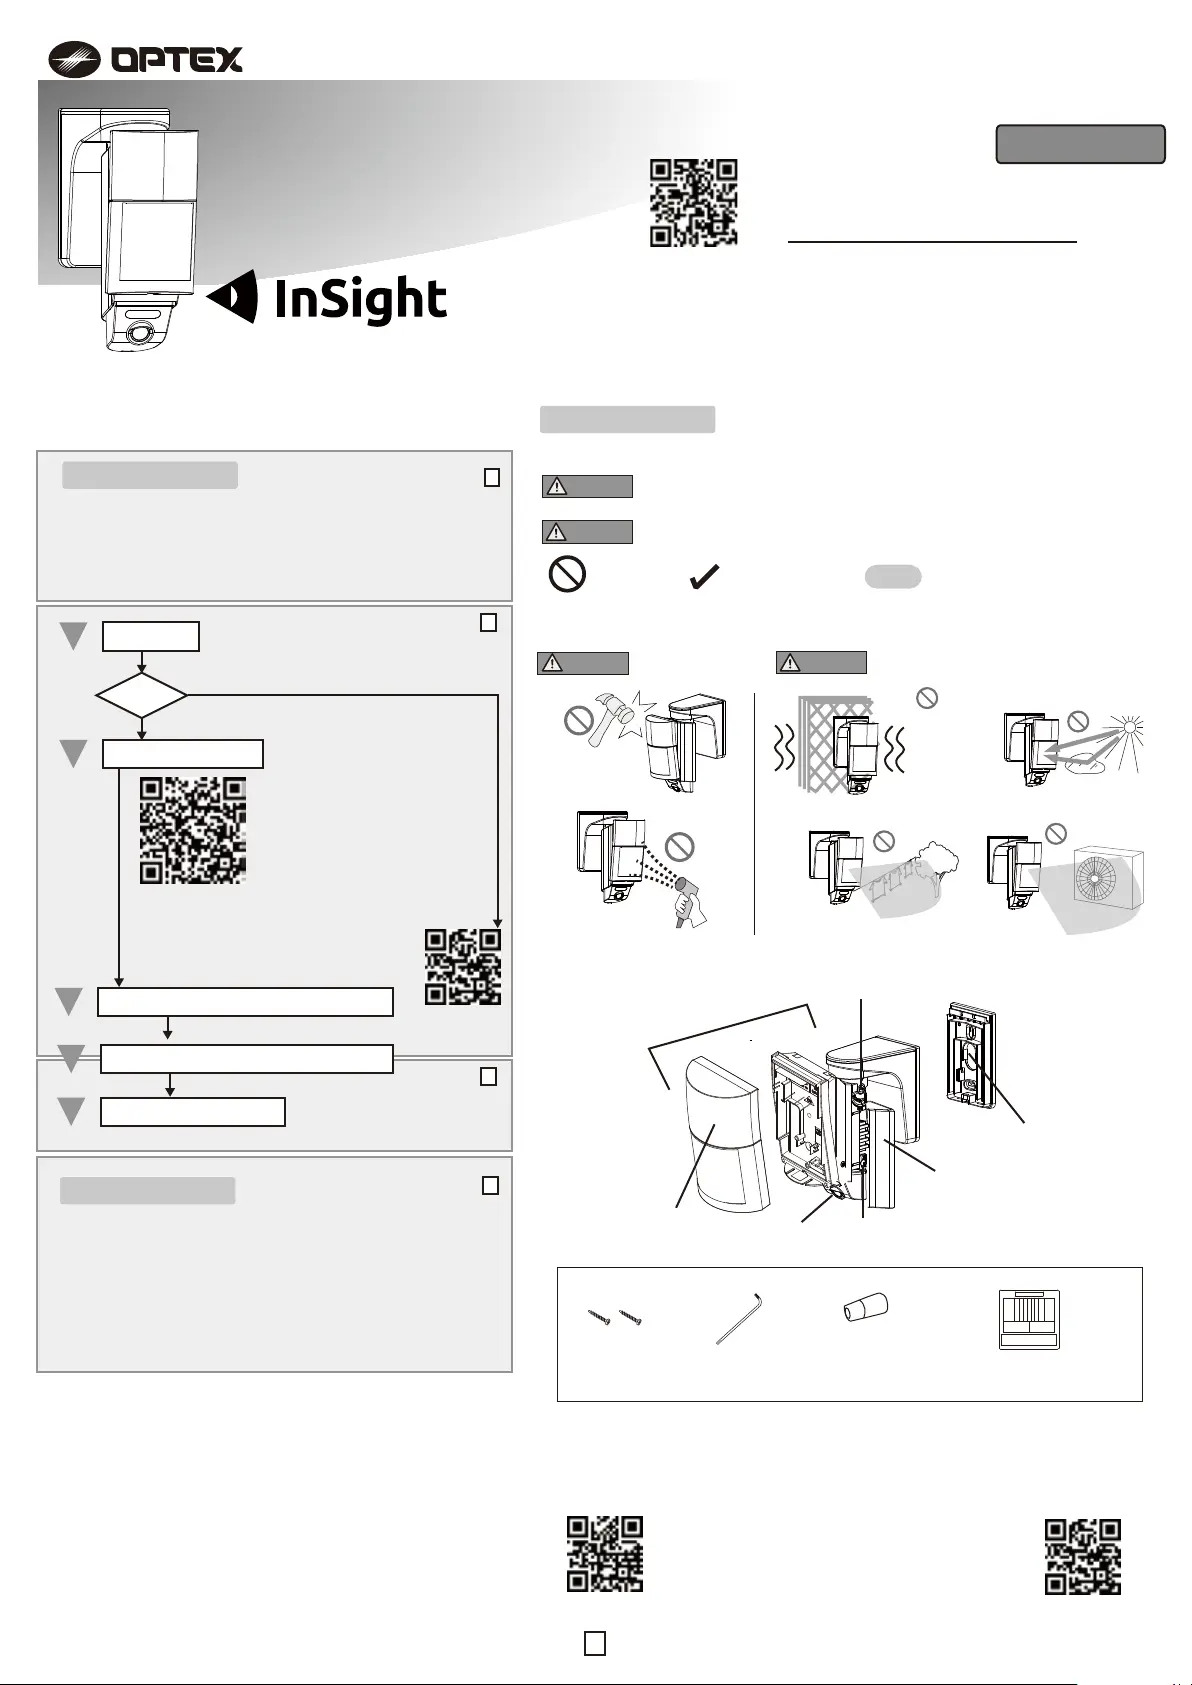
Warning
Caution
Full information is available at
https://navi.optex.net/manual/50426
This “Quick Guide” is the part of the entire installation instructions
that guides the installation procedures for installers.
Get the full information of the installation instructions from the web site.
If you need a guide to the operation of the whole system, please
consult the installer of the entire system.
•
•
•
1
series
- Parts identification
4 x 20 mm
Mounting screws
T20 Torx wrench
Waterproof cap
for LAN connection
PIR detector
Bracket angle adjusting screw
PIR cover
Camera unitCamera angle adjusting screw
Back cover
Mounting plate
PIR area masking strips
InSIght Camera manual
https://navi.optex.net/manual/50426/en/?type=cameramanual
Mounting on
an unstable
wall
- Manufacturer's statement
- Parts identification
- Accessories
- CHeKT account
- CHeKT account
If you do not have a CHeKT account, request a dealer account by visiting the
“CHeKT dealer” , before Step 3. Refer to the “CHeKT support” for more details.
CHeKT support
https://support.chekt.com
CHeKT dealer
www.chekt.com/registration
CHeKT support
https://support.chekt.com
Produktspecifikationer
| Varumärke: | Optex |
| Kategori: | rörelse detektor |
| Modell: | InSight INS-QXI-ST |
Behöver du hjälp?
Om du behöver hjälp med Optex InSight INS-QXI-ST ställ en fråga nedan och andra användare kommer att svara dig
rörelse detektor Optex Manualer

10 Mars 2026
3 September 2025
3 September 2025
3 September 2025
3 September 2025
3 September 2025
19 Juni 2025
rörelse detektor Manualer
Nyaste rörelse detektor Manualer
23 Mars 2026
19 Mars 2026
11 Mars 2026
21 Oktober 2025
19 September 2025
19 September 2025
18 September 2025
18 September 2025
18 September 2025
17 September 2025