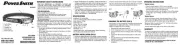
PowerSmith PHLR25FS Bruksanvisning
PowerSmith
Ficklampa
PHLR25FS
Läs gratis den bruksanvisning för PowerSmith PHLR25FS (2 sidor) i kategorin Ficklampa. Guiden har ansetts hjälpsam av 33 personer och har ett genomsnittsbetyg på 4.6 stjärnor baserat på 17 recensioner. Har du en fråga om PowerSmith PHLR25FS eller vill du ställa frågor till andra användare av produkten? Ställ en fråga
Sida 1/2
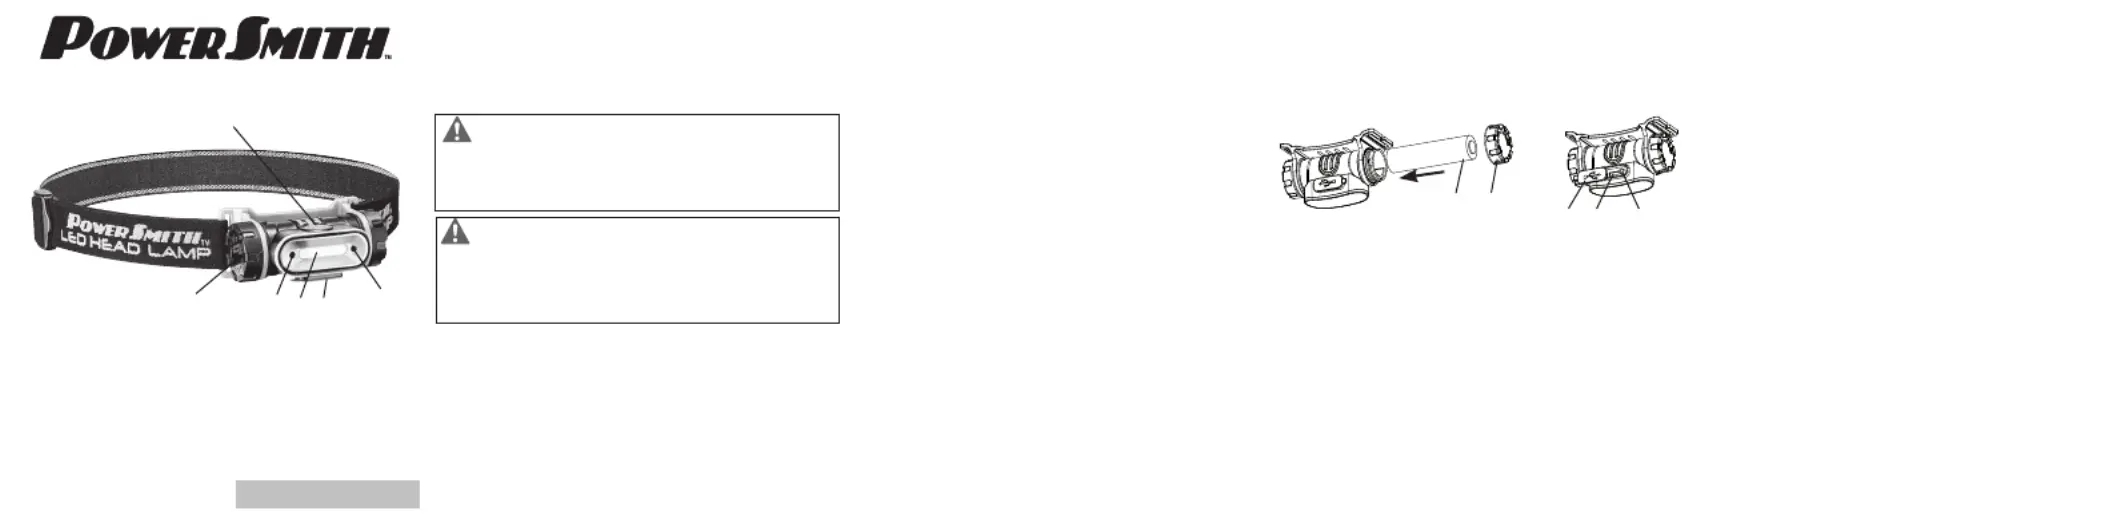
FIG 1
3
2
4
5
1
4
1. Switch Button
2. LED Light
3. Charging Port
4. Motion Sensor
5. Battery Side Cap
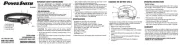
FIG 2
FIG 3
5
6
7
8 9
250 LUMEN
RECHARGEABLE LED
FLOOD HEAD LAMP
PHLR25FS
IMPORTANT SAFETY INSTRUCTIONS
READ AND UNDERSTAND ALL WARNINGS, CAUTIONS AND
OPERATING INSTRUCTIONS BEFORE USING THIS EQUIPMENT.
Failure to follow all instructions listed below may result in electric
shock, fire and/or serious personal injury.
WARNING:
Do Not Look directly into LED Light.
Do Not shine the LED light directly into the eyes of others.
Do Not allow children to use LED light unless under the
supervision of an adult.
WARNING: This head lamp is powered by a Lithium-
ion battery. Lithium-ion batteries are small, compact and ideal for
providing long-lasting power to this product. However they must
be used and charged properly. Improper use can result in serious
injury, fire or death.
• Do not place this lithium-ion battery powered product in fire or
apply heat to it.
• Do not apply strong impact or shocks to this lithium-ion battery
powered product.
• Do not allow the lithium-ion battery to get wet.
• Do not leave this lithium-ion battery powered product in the
direct sunlight, or use or store it inside cars in hot weather.
Doing so may cause the battery to generate heat, rupture, or
ignite. Using the battery in this matter may also result in a loss
of performance and a shortened battery life.
• NEVER THROW WATER ON A BURNING LITHIUM-ION BATTERY! If
a lithium-ion battery does catch on fire, it will burn even more
violently when contacted with water. Use a fire extinguisher.
• Store the product at temperatures between 41°F and 77°F (5°C
and 25°C).
• Properly dispose of all batteries at a recycling center or per local
code. More information regarding battery disposal in U.S. and
Canada is available at; http://www.rbrc.org/index.html, or by
calling 1-800-822-8837 (1-800-8BATTER).
SPECIFICATIONS
Brightness: 250 Lumens Max
Power: 3.7V Rechargeable Lithium-Ion Battery, 2200mAh
Beam Distance: 65 Feet
Beam Angle: 120°
Modes: High-Low-Flashing
Run Time: Up to 12 Hours
Charge Time: 4-5 Hours
Net Weight: 3.6 oz
Includes: Head Lamp, 18650 Rechargeable Lithium-ion Battery,
USB charging cable and Operator’s Manual
BATTERY INSTALLATION (FIG 2)
1. Remove the battery side cap (5) by rotating it counter-clockwise.
2. Insert the 18650 lithium-ion rechargeable battery (6) included
with the correct polarity. Match the (+) and (-) symbol on the
inside of the compartment with the corresponding symbol on
the battery.
3. Replace and secure the battery side cap by rotating it clockwise.
Tips: There are two raised marks on battery side cap and one mark
on the main housing for the side cap alignment purpose.
CHARGING THE BATTERY (FIG 3)
The head lamp can be recharged by connecting the included USB
charging cable to a USB power output, a cellular phone power
adaptor or a laptop USB port for example.
1. Make sure the head lamp is turned off.
2. Lift the charging port cover (7) to expose the charging port.
3. Connect the Micro end of the charging cable to the charging
port (8).
4. Connect the USB end of the charging cable to a USB power
output.
5. The LED Indicator (9) will be illuminating RED, indicating
charging is in progress.
6. The LED indicator turns GREEN when the charging is
completed.
OPERATING INSTRUCTIONS
Switch Actions
• Press the switch button (1-FIG1) to turn on the light.
• Press the switch button continuously to rotate the light mode in
following sequence: High-Low-Flashing-Off.
• Press the switch button to turn the light off if one of the working
modes- High, Low or Flashing- has been on for more than 10
seconds.
Motion Sensor
To turn on the motion sensor, press the switch button (1-FIG 1)
once to turn on the light, press the swtich button again and hold
until the light turns off. The motion sensor is now turned on.
Wave your hand or an object about 2”-4” from the motion sensor
(4-FIG1) to turn on/off the light.
Press the switch button again to turn off the motion sensor.
WARRANTY
This product is warranted free from defects in material and workmanship
for 2 (Two) years after date of purchase. This limited warranty does not
cover normal wear and tear or damage from neglect or accident. The
original purchaser is covered by this warranty and it is not transferable.
Prior to returning your product to store location of purchase, please call
the Toll-Free Help Line for possible solutions.
ACCESSORIES And BAttERIES InCLUdEd In tHIS KIt ARE nOt
COVEREd BY tHE 2 YEAR WARRAntY.
TOLL FREE HELP LINE:
888-552-8665
powersmithproducts.com
Operator’s Manual
Produktspecifikationer
| Varumärke: | PowerSmith |
| Kategori: | Ficklampa |
| Modell: | PHLR25FS |
Behöver du hjälp?
Om du behöver hjälp med PowerSmith PHLR25FS ställ en fråga nedan och andra användare kommer att svara dig
Ficklampa PowerSmith Manualer
24 Augusti 2025
24 Augusti 2025
Ficklampa Manualer
- Spanninga
- Arcas
- LED Lenser
- SureFire
- Dometic
- Knog
- Beghelli
- PCE
- Alpen Optics
- Dorr
- Livarno
- GP
- FoxFury
- SuperNova
- Greenlee
Nyaste Ficklampa Manualer
12 Oktober 2025

12 Oktober 2025
9 Oktober 2025
9 Oktober 2025

9 Oktober 2025
8 Oktober 2025
8 Oktober 2025
8 Oktober 2025
8 Oktober 2025
7 Oktober 2025