Mount-It! MI-7919 Bruksanvisning
Mount-It!
Platt panelstöd
MI-7919
Läs gratis den bruksanvisning för Mount-It! MI-7919 (9 sidor) i kategorin Platt panelstöd. Guiden har ansetts hjälpsam av 23 personer och har ett genomsnittsbetyg på 4.7 stjärnor baserat på 12 recensioner. Har du en fråga om Mount-It! MI-7919 eller vill du ställa frågor till andra användare av produkten? Ställ en fråga
Sida 1/9

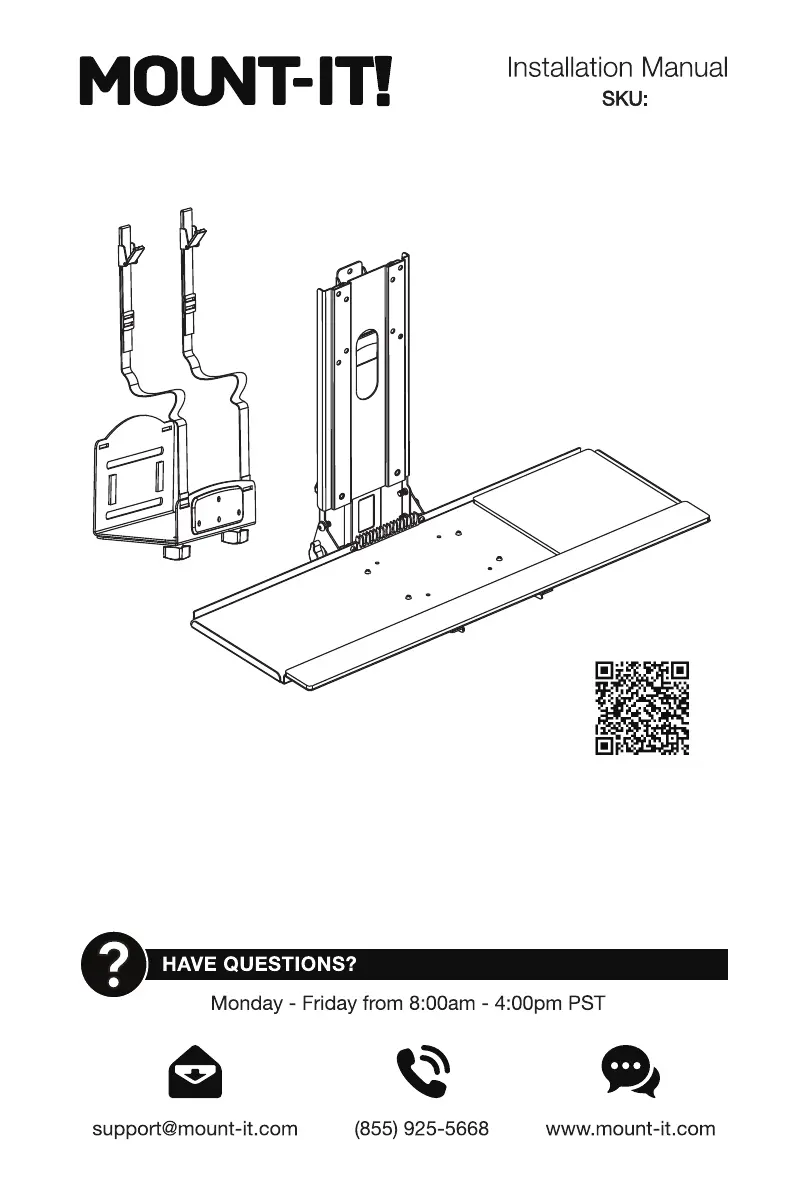
SIT-STAND WORKSTATION
WALL MOUNT
MI-7919
Scan this QR code for
product information, videos,
and assembly assistance.

Thank you for choosing Mount-It
2
3
Mount-It!
Mount-It!
Missing Parts? Call us at (855) 925-5668 and we will ship replacement parts free of charge.
CHOKING HAZARD. Package includes small parts.
Not for children under 3 years. Adult supervision is required.
Check carefully to make sure there are no missing or defective parts. Some hardware provided may not
be used. Use the correct mounting hardware suitable for your installation.
DIMENSIONS & WEIGHT CAPACITY
Rated weight capacity is 22lbs.
Caution:
Ensure all mounting surfaces are capable of holding the weight of your mount.
DO NOT EXCEED MAXIMUM LISTED WEIGHT CAPACITY.
SERIOUS INJURY OR PROPERTY DAMAGE MAY OCCUR!
Mount and Accessories
Mounting Hardware Wall Mounting Hardware
VESA Mount
Mouse Pad Spacers Bolts BoltsKeyboard Level
Hand Knobs
Hex Wrench
Height Adjustment
Hand Knobs
Lower Bracket Keyboard Tray Keyboard
Arm – Left
Keyboard
Arm – Right
Monitor
Bracket

5
4
• Remove the bolt on the top of the VESA Mount (#A) and slide the VESA Plate off the wall bracket.
Prepare the VESA Mount
Step 1
• With a stud finder locate the studs and hold the wall bracket from the VESA Mount (#A) on the stud at
the desired height. Using a bubble level to ensure straightness mark the center of the mounting holes as
shown with a pencil.
• Use a 3/16” drill bit and drill on the marked locations to a depth of 2.2”
• Secure the bracket to the wall using Lag Screws (#W-A) and Washers (#W-C). Tighten the screws until
secure.
A. Wood Stud Mounting Option
Step 2
• Using a bubble level to ensure straightness hold the wall bracket from the VESA Mount (#A) to the
desired location on the wall and mark the center of the mounting holes with a pencil.
• Use a 3/8” drill bit and drill on the marked locations to a depth of 2.4”. Clear any dust and debris from
the holes and insert the Concrete Anchors (#W-B). Note: Do not drill mounting holes into mortar (such
as between bricks or stones) only drill and install into solid stone or concrete surfaces.
• Secure the bracket to the wall using Lag Screws (#W-A) and Washers (#W-C). Tighten the screws
until secure.
B. Concrete/Brick Mounting Option
Produktspecifikationer
Varumärke: | Mount-It! |
Kategori: | Platt panelstöd |
Modell: | MI-7919 |
Behöver du hjälp?
Om du behöver hjälp med Mount-It! MI-7919 ställ en fråga nedan och andra användare kommer att svara dig
Platt panelstöd Mount-It! Manualer
2 April 2025
2 April 2025
2 April 2025
22 Mars 2025
27 December 2024
27 December 2024
27 December 2024
27 December 2024
24 September 2024
24 September 2024
Platt panelstöd Manualer
- 3M
- Premier
- Rocstor
- Digitus
- Hitachi
- Sanus
- Ewent
- Samsung
- Fellowes
- Elite Screens
- Peerless
- Unicol
- Panduit
- Premier Mounts
- Valueline
Nyaste Platt panelstöd Manualer
8 April 2025
3 April 2025
3 April 2025
3 April 2025
3 April 2025
3 April 2025
3 April 2025
3 April 2025
3 April 2025
3 April 2025